
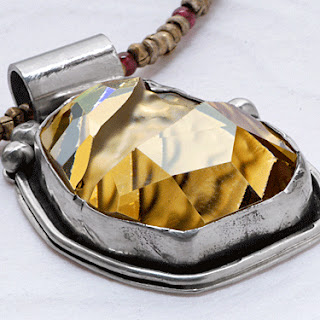
I’m sure you’ve read countless articles about taking great pictures for your Etsy shop. Today, while I was browsing my favorite blogs, I came across an easy to follow tutorial for taking pictures of your Jewelry. I’ve learned that photographing jewelry has its own unique set of problems; diminished light and shadow, reflection, out of the ordinary iridescence, and small details, making the process harder than other types of photography. And don’t even get me started on photographing Pearls! The tutorial written by “Via U! It’s your shot” gives an easy and inexpensive way to get great pictures of your product.


A window and a piece of cardboard is all you’ll need to take pictures of silver jewelry with brilliant, even tones....
1.) Move a table as close to a window as you can.

2.) Make sure that the top of the table is a higher than the window sill.

3.) Tape a piece of tracing paper to the window. Sunny or cloudy skies, the paper will make light coming in to be even and soft. Hang the paper so it goes down below the table.

4.) When using white paper as a background put something white underneath to avoid the table coming through making it look dark.

5.) I used a 2’ x 2’ piece of foamcore to bounce back light from the window, you can use anything that stands upright without bending. A piece of cardboard covered with sheets of white paper will work great.

6.) Light will reflect from the white card and from the white surface as well.

7.) Silver is like a mirror, it shows whatever is around. The light and white paper will reflect on the metal making it look light and shiny.

8.) If you pull the white card away from the window it will create a dark area that will also reflect on the jewelry.

9.) Different tones of silver make a picture have more depth. You may like the way it looks, or you may not. If you prefer the silver to have even tones make sure that the card is flashed against the window.

10.) However, if you do want your background to have a gradation of tones try replacing the white card with a black one. Blocking the light will create a shadow with a clear edge.

11.) Then you can play placing your jewelry where the background shifts from light to dark to see what happens.




 Posts
Posts




